
Autoptimize is a great plugin for optimizing your website. It minifies and removes unused CSS and JS, inline images, and lazy-loads images.
This results in smaller file sizes, faster page loading times, and improved SEO. In this blog post, we’ll show you the ideal Autoptimize settings to get the most out of it.
We’ll also explain how to set up Cloudflare or StackPath CDN to further speed up your website. Let’s get started!
The Ideal Automtimize Settings + Cloudflare/StackPath CDN
1. JS, CSS, & HTML
There are a number of settings that can be configured to optimize your website’s JS, CSS, and HTML. By carefully selecting the appropriate settings, you can improve your website’s load time and performance.
One setting to consider is the minification of JS, CSS, and HTML files. Minification reduces the size of these files by removing unnecessary characters, such as whitespace and comments. This can greatly reduce the time it takes for these files to download, leading to a faster website.
Another setting to consider is caching. Caching allows frequently accessed files to be stored locally on a user’s computer so that they don’t need to be downloaded from the server every time they’re needed. This can lead to a significant reduction in load times, as well as reduced bandwidth usage.
Finally, consider combining multiple JS, CSS, and HTML files into a single file. This minimizes the number of HTTP requests that need to be made, further reducing load times.
By carefully configuring these and other settings, you can significantly improve your website’s speed and performance.
2. CDN Options

When configuring the Autoptimize plugin for WordPress, you have the option to use a content delivery network (CDN). A CDN can help to improve the performance of your website by loading content from a server that is closer to the visitor’s location.
There are a number of different CDN providers to choose from, and each has its own advantages and disadvantages. Some of the most popular CDNs include Cloudflare, MaxCDN, and KeyCDN.
Before selecting a CDN, it is important to consider your website’s needs and budget. Once you have chosen a provider, you will need to configure the Autoptimize plugin to work with your selected CDN.
The specific steps will vary depending on the provider, but generally, you will need to enter your account details and select the appropriate settings. By following these steps, you can take advantage of a CDN to improve the performance of your WordPress website.
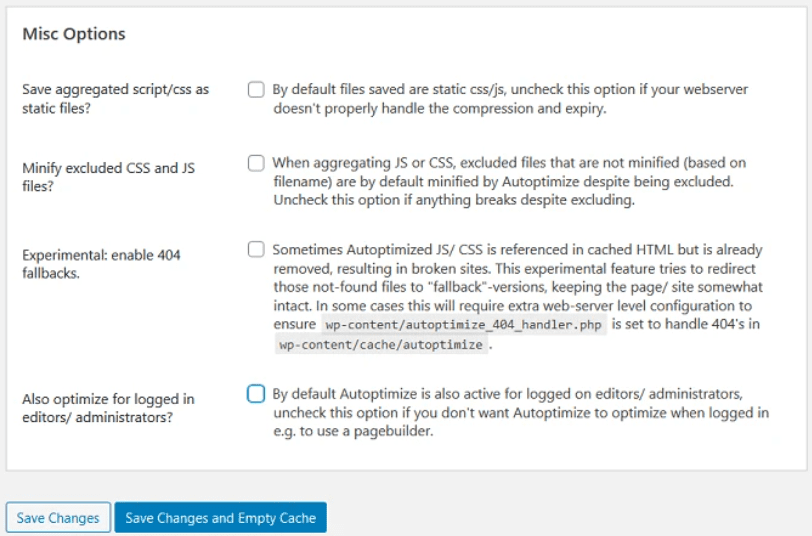
3. Misc Settings

The Autoptimize Settings Misc tab allows you to further configure the Autoptimize plugin to ensure that it is optimally configured for your site.
On this tab, you can choose to exclude specific scripts from being optimized, as well as enable disk caching and specify the cache timeout interval.
You can also choose to minify HTML and CSS code on this tab. In addition, you can specify whether or not to optimize for logged-in users and mobile devices. By properly configuring the Autoptimize plugin, you can ensure that your site loads faster and is more responsive.
4. Images Settings
An Autoptimize plugin is an essential tool for any WordPress site. It helps to optimize your website’s code and improve its performance. One of the great features of Autoptimize is the ability to optimize images.
By compressing your images, you can reduce their file size without compromising quality. This can help to speed up your website’s loading time and improve its overall performance.
The image settings in Autoptimize are easy to use and understand. You can select the level of compression that you want, and the plugin will do the rest.
You can also choose to exclude certain images from being optimized, which can be helpful if you have particularly large or high-quality images that you don’t want to compress.
Overall, the image settings in Autoptimize are a great way to reduce file sizes and improve website performance.
5. Critical CSS
If you’re using the WordPress plugin Autoptimize, there are a few critical CSS settings you should be aware of. When optimizing your CSS, it’s important to avoid including any unnecessary code.
This can be achieved by minifying your CSS and eliminating any unused rules. In addition, you should ensure that your CSS is correctly formatted before delivering it to the browser.
Finally, it’s also important to set an appropriate cache expiration time so that your CSS is cached and doesn’t need to be downloaded on every page load. By following these simple steps, you can optimize your CSS and improve your website’s performance.
6. Extra Settings
It is highly recommended that you disable the ” opt-out” setting in the Extra Settings. Doing so will improve performance by allowing Autoptimize to minify all CSS, JavaScript, and HTML on your website.
In most cases, there is no need for the ” opt-out” setting as Autoptimize is able to safely minify your website’s code without breaking it.
However, if you do encounter an issue with minification, you can always enable the ” opt-out” setting to have Autoptimize skip minifying that particular page or post.
By disabling the ” opt-out” setting, you can ensure that Autoptimize is able to optimize your website to its fullest potential.
7. Optimize More
One of the great things about Autoptimize is that it provides a lot of options for optimizing your website. However, with so many options available, it can be difficult to know which ones to use.
In general, you want to optimize your website for speed and performance. However, there are a few other things to keep in mind when choosing your settings.
First, you need to decide which areas of your website you want to optimize.
Second, you need to choose which file types you want to optimize.
And third, you need to select which optimization methods you want to use.
Once you’ve made these decisions, you can start tweaking your settings to achieve the best results. With a little trial and error, you can find the perfect combination of settings for your website.
8. Cloudflare
Cloudflare’s Autoptimize settings can help to improve your website’s performance by optimizing your CSS, HTML, and JavaScript files.
Cloudflare will first analyze your website’s code and then generate optimized versions of the files that are served to visitors. The main benefit of using Cloudflare Autoptimize is that it can help to reduce the size of your pages, making them load faster.
In addition, Autoptimize can also help to minify your code, which can further improve your website’s performance. If you are looking for a way to improve your website’s speed and performance, then consider using Cloudflare Autoptimize.
Quick Links
- How To Configure Cloudflare With Cloudways: Complete Guide
- How to Integrate Cloudflare with your Application?
- Ideal WP Super Cache Settings-Cloudflare Or Bunny CDN
Conclusion- The Ideal Autoptimize Settings + Cloudflare/StackPath CDN
Cloudflare and StackPath are two of the most popular CDNs on the market. They both offer a variety of services that can help speed up your website, protect it from DDoS attacks, and more.
If you’re looking for an all-in-one solution, Cloudflare is probably your best bet. However, if you want more fine-tuned control over how your site is cached and served, StackPath may be a better option for you.
We hope this article has helped you decide which CDN is right for your business. Have you tried using either Cloudflare or StackPath? Let us know in the comments below!